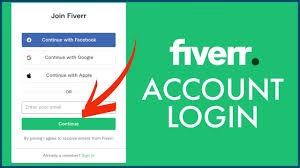

Fiverr | Freelance services marketplace | Find top global talent To log in to Fiverr, go to the official Fiverr website at fiverr.com and click the “Sign in” button. You can sign in using your email and password, or alternatively use options such as Google, Facebook, or Apple accounts to log in quickly. If using the Fiverr mobile app, the login process is similar with options to sign in with Google, Facebook, or email. If there are any problems logging in, sometimes clearing browser history or using a different device may help, or contacting Fiverr support if issues persist.
If you do not have an account yet, you will need to create one before logging in. Fiverr accounts allow you to both buy and sell services with the same login.
This method allows quick and easy access to Fiverr’s freelance marketplace services as either a buyer or seller.
Troubleshoot Google sign-in redirecting to create account
When Google sign-in redirects to creating a new account instead of logging in, common troubleshooting steps include:
- Verify the Google OAuth application setup is correct, ensuring all settings in the Google Developer Console match the login flow expectations.
- Check for conflicts with other plugins, extensions, or scripts on the site that may intercept or alter the redirect after Google authentication. Temporarily disabling other user or social login-related plugins can help.
- Clear browser cache and cookies or try signing in using an incognito/private browser window to rule out history or cookie conflicts.
- Ensure that after Google’s authentication, the site properly processes the user’s identity before redirecting; otherwise, it may trigger a redirect loop or wrong redirect.
- If the issue happens only for new accounts or on first login, confirm the system’s flow for new user creation is working correctly and not mistakenly looping or sending the user back to the account creation screen.
If these do not resolve the issue, detailed debugging of redirection logic on the site may be required, sometimes requiring server-side access to check how the login tokens and redirect URLs are handled after the Google sign-in response.
Check OAuth redirect URI settings in Google Cloud Console
To check and update OAuth redirect URI settings in the Google Cloud Console:
- Go to the Google Cloud Console at https://console.cloud.google.com/apis/credentials.
- Locate the OAuth 2.0 Client IDs section and find the client ID used for your application authentication.
- Click the “Edit” button for the client ID to open the configuration dialog.
- Under “Authorized redirect URIs,” review the URIs listed. These are the exact URLs where Google’s OAuth server will send users after authentication.
- Add or modify redirect URIs as needed to match the URLs your app uses for OAuth callbacks. The URI must use HTTPS (except localhost for development) and cannot contain wildcards.
- Save the changes after adding valid, precise redirect URIs.
Redirect URI mismatches are a common cause of login issues and redirect loops during OAuth sign-in attempts, so ensuring these URIs exactly match those used in the application is critical.
Open the OAuth clients page in Google Cloud Console for my project
To open the OAuth clients page in Google Cloud Console for a project, follow these steps:
- Sign in to the Google Cloud Console at https://console.cloud.google.com.
- Select the desired project from the project dropdown at the top.
- Navigate to the “APIs & Services” section and then select “Credentials.”
- Here, under “OAuth 2.0 Client IDs,” you will see a list of OAuth clients registered for the project.
- Click on any OAuth client to view or edit its details, including the authorized redirect URIs.
This is the place to manage OAuth client settings for your project, including redirect URIs and other credentials.
Go to Google Cloud Console OAuth clients page for project
To go directly to the OAuth clients page in Google Cloud Console for your project:
- Open https://console.cloud.google.com.
- Select your project from the project dropdown in the top menu.
- Navigate to “APIs & Services” > “Credentials.”
- Under this section, you will find and manage your OAuth 2.0 Client IDs. You can view, edit, or create OAuth clients here.
This page is where you configure client IDs, authorized redirect URIs, and other OAuth settings related to your project in Google Cloud Console.
Show allowed redirect URIs for a specific OAuth client ID
Allowed redirect URIs for a specific OAuth client ID are the exact URLs registered with the OAuth provider (e.g., Google) where the OAuth server is permitted to redirect the user’s browser after authentication. These URIs must exactly match the redirect URI included in the OAuth authorization request.
For a Google OAuth client ID, to view the allowed redirect URIs:
- Open the Google Cloud Console.
- Go to “APIs & Services” > “Credentials.”
- Find and select the OAuth client ID in question.
- Under the client details, the “Authorized redirect URIs” section lists all the allowed redirect URIs.
- Each URI represents a secure endpoint on your app where Google can send the OAuth response.
The OAuth server strictly checks that the redirect URI in an authorization request matches exactly one of the authorized URIs; otherwise, the request will be rejected to prevent redirect attacks.
Export the client’s redirect URIs to a text file
There is no built-in Google Cloud Console feature to directly export OAuth client’s redirect URIs to a text file. However, the allowed redirect URIs can be manually copied from the OAuth client details page and saved into a text or CSV file.
Basic steps to export manually:
- Open the OAuth client in Google Cloud Console under APIs & Services > Credentials.
- Copy the list of “Authorized redirect URIs.”
- Paste into a text editor or spreadsheet and save as a text (.txt) or CSV (.csv) file for backup or sharing.
If automated export is needed, it typically requires using Google Cloud API or scripting to fetch OAuth client details programmatically and then write the redirect URIs to a file.
For straightforward usage, manual copy-paste is the typical approach.
Export redirect URIs for all clients in this project to CSV
There is no built-in feature in Google Cloud Console to directly export redirect URIs for all OAuth clients in a project to a CSV file.
To accomplish this, you would typically need to:
- Programmatically query the Google Cloud APIs to get OAuth client details.
- Extract the redirect URIs for each client.
- Format and save this data in CSV format using a script or tool.
Manually, you can open each OAuth client in the Google Cloud Console, copy its redirect URIs, and paste them into a CSV file.
If automation is required, it involves using Google Cloud APIs or SDKs to list OAuth clients and their details, then exporting those programmatically to CSV. This is not a standard feature through the web interface itself.
Save exported CSV to a specific Cloud Storage bucket
To save an exported CSV file to a specific Google Cloud Storage bucket, the general approach is:
- Generate or have the CSV file locally or programmatically.
- Use Google Cloud Storage SDK or CLI tools to upload the CSV file to the desired bucket.
Example in Python using google-cloud-storage library:
python
from google.cloud import storage